photo about-14.png photo contact-10.png photo FAQ.png photo press-2.png photo shop-3.png
Showing posts with label DIY. Show all posts

+ DIY: GOLD LEAF SEAHORSE ART


It's been way too long!  How is everyone?  I meant to get this post up a month ago but of course life got in the way.  What's new, right?  Anyway, a while back I saw an image (which I have hunted for and for the life of me CANNOT find because I'd love to give credit to the inspiration) of a gold leaf seahorse and had to have it. Turns out the art was around $400 and not in my budget.  I decided to DIY the project myself with a little gold leaf kit, a seahorse stencil, frames I already owned, and some white craft paper. 

 the kit I bought online, you can get it here

the stencil I purchased here, the 11" reusable 

To start, I taped down my stencil on craft paper.  From there, all I did was follow the instructions on the gold leaf package.  After following all the steps on the packaging, gently remove your stencil.  The only thing I didn't do was apply the top coat that they provide.  And, that's it!  It definitely took some time because I had to do 3. Tedious project, but I'm very happy with the end results!


Also, never got around to showing the paint color in the bedroom.  This was done in Benjamin Moore Gray Owl at 50% formula.  I'll have to take a picture of the entire room soon so you can see the color better.  Which I guess means I'll post that next month...


Sources: Headboard is Joss & Main that I covered with a RH striped duvet.  Euro pillows are Caitlin Wilson, the rest of the bedding is RH, and lastly- the frames are RH.

+ DIY: MORNING & EVENING SCRUBS


I recently ran out of my homemade scrubs and was in desperate need for a fresh one.  I've made several scrubs in the past (you can find them here, here, here and here) but my all-time favorite homemade scrub has got to be the coffee scrub.  I know it wasn't as popular around here as some of the others, but I am obsessed with it. If you like the smell of coffee you will love this one.  Bonus: If you have a bag of whole beans that have expired, you don't have to throw them out- make a scrub.


Scrubs are such a lovely way to exfoliate the skin and create a nice glow.  Opening up a jar during a rushed shower can give you a tiny escape from your busy day ahead, or relax you in the evening before you get into bed.  They are also wonderful for dry skin, before you shave, and before you apply a self tanner.  


Here is how you can create a morning and evening scrub for yourself, or as a gift.  None of the items below truly need to be organic, but it's always nice to treat yourself to organic goods if you can.

Morning Vanilla-Coffee Scrub: 

1 cup of whole organic coffee beans pulsed in a grinder (a little more than coarse will do the trick)
1 cup of organic raw sugar (you can pick this up at any natural food store or even trader joes)
1/4 cup of organic bragg olive oil (or whatever olive oil you have on hand)
1/3 cup of organic raw coconut oil (doesn't have to be raw)
1/2 teaspoon of organic vanilla

Evening Lavender-Rose Scrub: 

1/2 cup of kosher salt
1 1/2 cups of organic raw sugar
1 tablespoon of organic bragg olive oil
30 drops of lavender oil
30 drops of rose oil

For both scrubs I've used 1 pint jars.  You can find them here.  Add your ingredients into a jar, stir them up with a knife, seal the jar with the lid, shake it really hard, and then you're done.  If you find it's too dry, add more oil.  Too oily, add more sugar.  Here's the catch though: Every single jar will come out differently based on your ingredients and your climate.  I have received a lot of questions around scrubs, but here are the top two I get:

Will the coconut oil solidify? Yes, it can if you have a cold bathroom.  The solution?  Scoop the scrub out of the jar & add a bit of water to it- then mix it up in your hands.  It will warm it up and work fine.  The scrubs above though use some olive oil which will help prevent it from solidifying.

What is the shelf life? I have used them up to 3 months with no issues, but again, everybody uses different ingredients and has different climates.

I really do suggest messing around with scrub recipes.  Typically you can use just about anything in your cabinet to whip one up.  The idea is it's cost effective and free of any harmful chemicals :)

Enjoy a spa day/night soon!

+ DIY: OCTOPUS PILLOW


I've always been in love with homes that have a relaxed beach vibe to them. Now that we are living in Tiburon, it makes me want to incorporate the sea even more into our place. Bringing more beach-like items into the home can be tricky though. You want your home to be inspired by the beach elements without having a beach knick knack on every shelf. You know what I mean? For me at least. Although, I'm finding myself picking up anchor items, coral pieces, etc. lately so I'll need to keep myself in check...


Recently I came across some beautiful octopus pillows.  The colors were off for our place and they were way out of my budget. But...having a DIY mindset I immediately thought- I can make these covers.  And that's what I did.  Here's what I used:


1. Old Cd Case
2. Paint Brush
3. Octopus Stamp
4. White Fabric Paint
5. Navy Acrylic Paint
6. Two Pillow Covers in Blue Smoke from here (they were on sale in the store and I had a coupon on top of that). Of course you could use any pillow cases you had on hand.  Including bright white for a bed.  That would be delicious. 

* I had all the above items except for the paint and pillow covers.


Here is the how to:


1. Place a piece of cardboard in between the fabric on the pillow cover & decide how you want your pattern to look.  I did rows of 3 and 4, alternating the stamp upside down every other stamp.

2. Squeeze a few drops of white paint on the cd case and lightly touch your stamp to the case.

3.  Press the stamp down lightly, but the hold your weight on it, and when you lift up, hold the fabric tight on both sides of the stamp then lift up.  Lifting up towards the ceiling is very important.  

4. Continue the process until you have something you like.

5. Go back with a paintbrush and white paint and fill in any areas that didn't quite get stamped (I didn't want it too perfect though, wanted to keep it organic looking so I left some areas ligher, etc.)

6. Use your paintbrush with the navy paint to draw in the eyes.  


That's it!  Definitely one of my favorite diy projects I've done in a while!

Have a great Father's Day weekend and I'll be back on Monday to recap our 1 year anniversary trip we took last weekend.  This Sunday marks our actual 1 year anniversary!

+ DIY: LAVENDER DRYER SHEETS


I happen to be a very finicky laundry gal.  I really like soft, static free and delicious smelling laundry when I grab it out of the dryer.  Over the years, I've tried to lean more towards the natural products- but, the problem is...they never work (for me at least).  And, paying $7-8 for Meyers sheets that leave my clothes with static- was sorta driving me nuts.  

I decided to try adding my own scents to bounce free & sensitive dryer sheets and I think I've finally found something I like. My clothes come out static free with a very light scent of lavender.

Here is what I do: 

Add around 10-15 drops of your lavender oil onto the sheet and let it set for the duration of having your clothes wash.  Then pop the dryer sheet in the dryer with dryer balls (obsessed with dryer balls and will never go back- they make your clothes even more soft than you can imagine).  That's it...and,you could easily do this with any scent.  Orange is up next on my list. 

supplies:


*this is not a sponsored post for bounce

+ CHRISTMAS AROUND THE LOMBARD COTTAGE

Every year the month of December seems to go by quicker and quicker for me.  As one of my favorite months of the year, I want to freeze it and spend more time with family and friends, more hours baking Holiday treats, drinking eggnog,  and of course enjoying the beautiful decorations and lights that fill the streets and homes.  This time of year is magical to me, as cliche as that is!

Anyway, I can't believe Christmas is next week!  Holy smokes.  If I wait any longer to get this post up Christmas will be over...

This year I tied a bunch of cheapo gold glitter star ornaments together to make some garland.  It makes me very happy when I'm watching Home Alone & Elf for the fifth time this season from my sofa!


Oh, and I am ecstatic about this gold dot pillow from Caitlin Wilson Textiles, LOVE IT.  Another item that I'm stoked to be looking at in between Christmas movies, stuffing my face with Christmas cookies & shopping online for last minute gifts!

The sweet girls over at Enjoy Events sent us the most beautiful card with pretty garland wrapped around it.  Added it to this little mirror and ship painting.  Such a fun touch at the front door ;)


I ordered this magnolia wreath and it was bright green and fun to look at for a little while...then, it turned an ugly brown.  Then I imagined it shiny and gold and how fabulous it would be if I painted it gold.  Total. Fail.  Did not turn out the way I thought.  But as a diyer, it would have driven me nuts if I didn't at least try it.


For our tree, I tied leftover navy & blue ribbon from the wedding onto our lights as garland.  They fell off the entire time I was placing them on the tree (thought I'd tell you that in case you try it).  Instead, I decided to tie them once the lights were placed.  Much, much easier.


love me some navy & white stripes!


here she is, all lite up! 


more bows...and collected ornaments over the years (the little ballet shoe is from one of my first nutcrackers I went to).


 one more tree pic, I mean, I took the tripod out for this shot...might as well post a few!


found some cheerful & bright wrap in my gift wrap stash and used that to cover a few gifts: 


added some texture with some twine: 


and there you have it. 
christmas around our place.

our wedding: reception details + dancing!

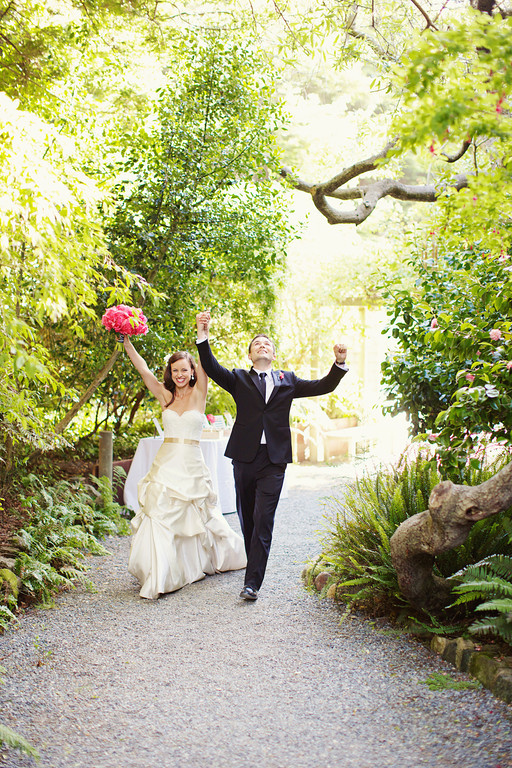
Almost done with all the wedding posts (brace yourself, this is a LONG one)!  Next up is the reception details. While everyone grabbed a cocktail and found their seats, we were hiding out in our photobooth.  Super cheezy, but this was such a magical moment. The ceremony had just finished and we were on a gnarly "holy smokes we are married" high.

After we left the booth we met our guests walking out to one of our favorites, M83 "Midnight City"
and now to the actual details of the reception: 
I loved the way our tables turned out.  Laura Miller Design found the perfect beaker-ish vases and filled them with the most gorgeous peonies.  
I purchased several lanterns to scatter on the tables from here, and then the tables were covered with votives. 
I would have never thought I cut myself out for such a crazy project when I decided to do my own table numbers. I actually saved it for last thinking it would be the easiest project of this entire wedding.  Ha, I was so wrong.  I purchased table numbers from here, which were one sided, glued them so that the number would show on both sides, cut them down, and then embossed a heart stamp on each side.  I didn't like any of the place card holders I had found anywhere, and finally scored some I liked here (had a few coupons which made the price much better). 
We had a friend (several actually- thanks again for all who made the trip!) who came all the way from NY for the wedding and it happen to be her birthday so we made sure there was a little something at her place setting to acknowledge her day.  We found this adorable notebook from here, which was a great reminder of the city where her friends are awaiting her to come back. 
The menus were made by minted, again incorporating our invites ~ and I had each white napkin rolled up and tied with a navy and white striped ribbon ( I can't tell you how much navy & white striped ribbon I purchased for this wedding!  every width, every material...).
Because embossing the escort cards, cocktail napkins, table numbers...etc. wasn't enough- I decided to emboss the place cards as well. Minted helped design and print the cards, and we came up with the "save room for the good stuff".  After coveting so many gorgeous champagne flutes that we couldn't afford, I ended up falling in love with our white polka dotted champagne flutes that I paid almost nothing for.
We were moved by all the thoughtful prayers, stories told and speeches that were made.
and then we hit that dance floor and never left except to cut the cake (our first dance song):
get ready for an onslaught of dance pictures...because that's all I wanted to do at my reception is dance.
{our first song we danced to with our bridal party}
cut the delicious susiecakes cake!  we go there all the time for a slice on chestnut street:
oh, we also showed a slideshow in between the dancing!  you may or may not notice the glow sticks have emerged... 
went back to dancing with the best man...
dance. dance. dance.
threw the bouquet with a glow stick around my head...classy bride, I know.
and then things got really cray...apparently the guys felt shirts were optional at this point- yep, that's my husband:
the famous SHOUT came on and we all got "a little bit softer now".  
and then it was time to say good-bye and we had a few treats ready to go:
The blankets were put out earlier in the night, put in a basket, added a white frame and wrote in gold marker "warm up" and then added the striped ribbon- for the popcorn bags (I make popcorn stovetop almost every night of the week so we thought only fitting to give popcorn as a snack to go).  I designed the "popped with love chris and carlee" labels and had then had them printed to keep the navy and white striped bags closed. 
I wanted to give out personalized matches with the sparklers but didn't want it to just be a monogram or our date, so Chris came up with "light 'em up!" and I loved it.  We had them printed on white books with gold text. 
the night ended with us running through a sea of sparklers (managing to rid ourselves of any glow sticks and putting back on shirts).

Wow, what an incredible time we had.  We will cherish this day forever.  Again, this day would not have been the same without our amazing friends & family and all the vendors who helped bring our ideas to life.

Thanks for letting me share the details with you all.
xoxo

*all photos gem photo, except the champagne flute and matches